A TRACK 1 AUDIO MIXING GUIDE
Place an orchestra.
Build a sense of depth.
A useful soundstage has both left-to-right direction and front-to-back perspective. Treat those as related choices, then listen to the complete arrangement.
By [TODO name] · Published · Updated
Start with a listening perspective
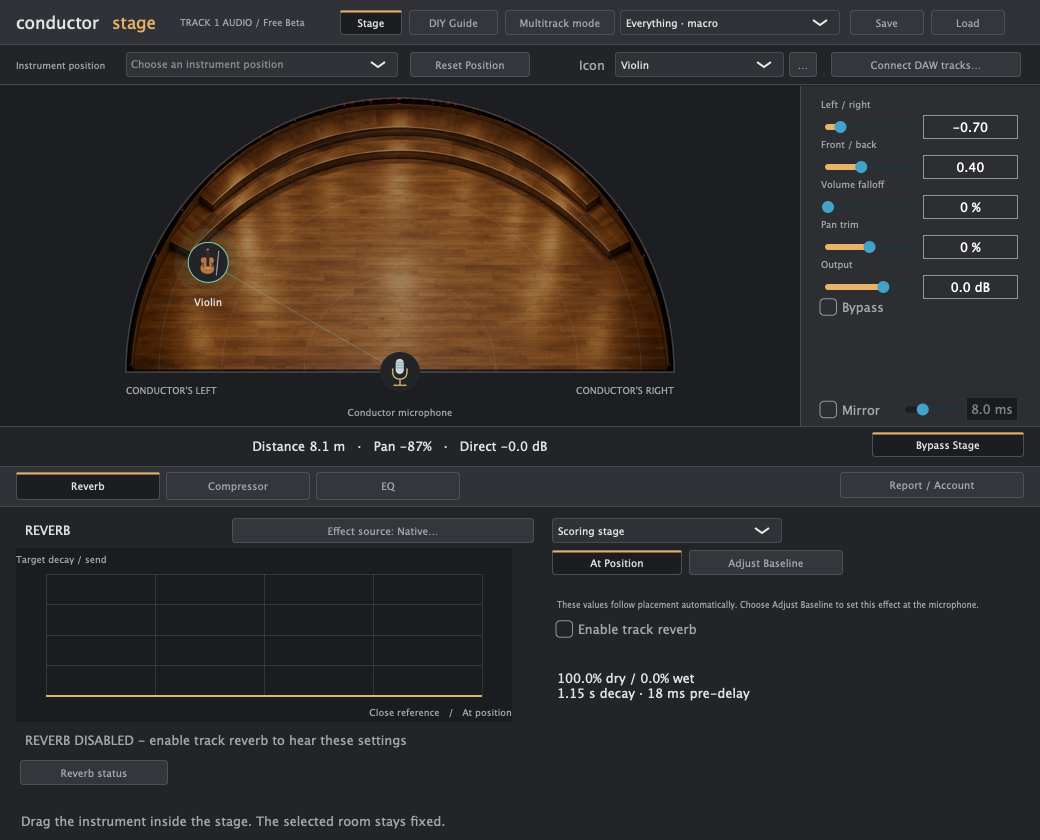
Conductor Stage uses a microphone at the center of the stage’s front edge. The nearest position establishes the baseline. It can be completely dry or already include ambience, depending on the sound you choose. Once that close sound is useful, position can add more distance treatment while the room itself stays fixed.
Use mono or relatively dry sources when you want the stage to define the environment. A sample recorded in a large hall already carries reflections and width; added processing cannot remove those original room cues.
Choose seating as a starting point
A common modern layout places first violins on the listener’s left, with other strings spread across the front, woodwinds behind them, and brass and percussion farther back. Split violin seating is another established arrangement. There is no universal layout that every orchestra follows. For a concrete seating reference, see the Nashville Symphony’s orchestra layout; it is an educational reference, not an endorsement of this plugin.
For a hybrid production, use the same idea without forcing every part into traditional seating: keep the lead part clear, give supporting keys a complementary direction, and leave space between a bass fundamental and wide low-frequency effects. Conductor Stage’s instrument presets are suggestions, and your own saved positions can suit the arrangement better.
Use reverb to describe depth without changing the room
First choose decay, pre-delay, damping and reflection character for the ensemble’s environment. Then set how much of that reverb belongs at the microphone and at the rear. A close part may have very little wet signal; a rear part can have a higher reflected-to-direct balance in the same room.
For a simple example, a 10% microphone baseline and 50% rear maximum allow intermediate positions to occupy that range. Conductor Stage derives the position value from its distance model; halfway up the graphic is not necessarily a linear halfway point in Mix. Use the reported current target as the value to reproduce in another chain.
With a compatible hosted reverb, keep the vendor’s room and character settings as your chosen baseline, map its Mix properly and let Conductor Stage drive that Mix target. Do not assume every vendor represents a wet/dry parameter with the same units or behavior.
Let EQ support perspective
Distant sound can lose high-frequency detail, but a real room and instrument’s directionality complicate that relationship. In a mix, a gentle high-frequency reduction can help push a part back. A low cut can keep the reverb return from obscuring bass. Heavy EQ can also erase the articulation that tells the listener what the instrument is.
Set the closest-position tone in Adjust Baseline, then choose the strength of the position-linked EQ. Compare the resulting filter targets in the DIY guide rather than applying a generic “rear instrument” preset to every part.
Separate dynamics from literal acoustics
A studio compressor does not physically model sound traveling through air. Position-linked compression is a creative way to control transients and density within the staged arrangement. Start subtly and listen for lost attacks, especially on percussion, plucked strings and piano.
Use threshold, ratio, attack, release, knee and makeup as a coordinated baseline. Gentle, medium and heavier settings change the starting treatment; the placement model then applies its relative changes. Loudness matching helps you judge the compression rather than simply favoring the louder result.
Choose whether distance should change level
Volume falloff is optional. Set its slider to 0% when the mix balance is already right and you only want direction and effect changes. Higher values create stronger distance attenuation. Room presets supply suggested falloff amounts, which you can revise.
DAW pan controls also differ: a stereo balance control mainly changes the existing channel levels, while a spatial placement processor can redistribute the stereo signal and combine a mirrored voice. A copied Logic balance value alone therefore need not sound like Conductor Stage. The Stage Placement utility preserves the plugin’s placement processing when capturing a chain.
Recreate a current position in your DAW
Open the position-specific DIY guide and use its reported order and values: enabled track effects, direction/mirror/distance gain, reverb at that position, final trim, then any shared master processing derived for the source. Preserve the existing track fader and routing. Disable the live Stage processing when auditioning a captured chain so you do not hear both treatments together.
Stock compressors, EQs and reverbs can approximate these targets, but different algorithms and pan laws may not produce an identical signal. A snapshot also does not carry over future position automation.
Explore Conductor Stage or try the free single-track edition.